

Why use a LoRa Antenna
Our testing of the Emlid Reach RS GNSS real-time kinematic (RTK) units continues. The units deliver impressive results. We find the units to be very accurate at a fraction of the cost of comparable or Survey grade RTK units. When using two Reach RS units in the field you will need to configure the units to communicate RTCM3 correction data for RTK. The simplest method is to use the built in LoRa radio to send and receive the correction messages between the base and rover. Utilizing the LoRa radios for RTK corrections requires using the supplied LoRa antenna.
The supplied LoRa Antenna
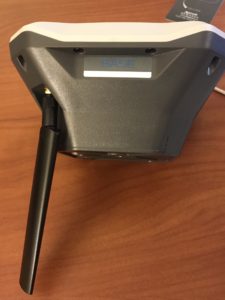
The supplied LoRa antenna appears to be a directional antenna due to it having two flat sides. Directional antennas are great an minimizing interference by radiating the signal in specific directions. Focusing the signal ensures more of the signal power goes into the direction you. The signal is narrow close to the antenna. The signal width gets wider as the signal travels further away. This will be ideal for long distance base lines due to the limited interference with focused signal strength. Emlid has post detailing the supplied antenna reaching a 19.2 km baseline. 19.2 km is nothing short of impressive, however it does require a clear line of sight.
Our LoRa Antenna use
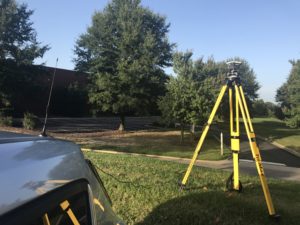
We prefer to set up our Reach RS Base in the middle of the area we are working while using the base and rover configuration. The ideal setup allows our base to be on a high point in the center of the land. When set up in the center our rover will move around the base while collecting points. Using this strategy we keep the baseline distance from one end to the other end of our project pretty consistent. The directional antenna is great for hitting a long range baseline, however we rarely need our baseline greater than 100m.
Using an Omnidirectional LoRa Antenna
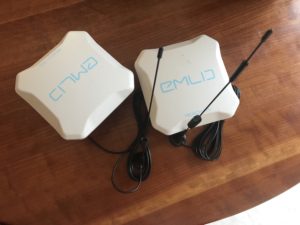
An omnidirectional radiation pattern is ideal when the base is in the center. Using an omnidirectional antenna provides a consistent LoRa signal in all directions around our base. A donut like radiation pattern helps ensure we have optimal signal coverage around our base. We purchased two different metal whip antennas with magnetic bases for our test. The photos show the 5 db omnidirectional antennas we are using. The magnetic base allows the base antenna to be placed on the roof of our vehicle which was about nine feet away from the base. These antennas have a 10′ cable attached. The 10′ cable allows us to put some distance between the GNSS antenna and the LoRa antenna.
A side benefit?
Our signal noise appears to decrease when using the omnidirectional antenna away from the base. Private reference station networks from providers like Trimble or Topcon stations do not have LoRa antennas in close proximity to their stations. They utilize computer network connections to transmit correction data. This is more than likely to improve the GNSS reception and quality of the signal. We need to continue testing this to document the existence of GNSS reception improvement while placing the LoRa away from the Reach RS.