
Setting up SNIP NTRIP Caster and Reach RS
I’ve seen a number of people at the Emlid forums asking about setting up NTRIP and how to utilize an NTRIP Caster with Reach and Reach RS. Setting up your own NTRIP Caster using Reach RS is not that difficult, however you do need to make sure have the correct network infrastructure. For this example we are going to us SNIP, a simple NTRIP Caster with a Free option for limited connections. To follow this setup you will need two Reach RS units, one to be the base and one to be the rover . Running your own NTRIP Caster will require a publicly available IP address for the computer running the Caster and an internet connection for your Rover when in the field. I typically run a hotspot from my iPhone for my Reach RS Rover for internet access.
Download SNIP from https://www.use-snip.com/download/ and install it.
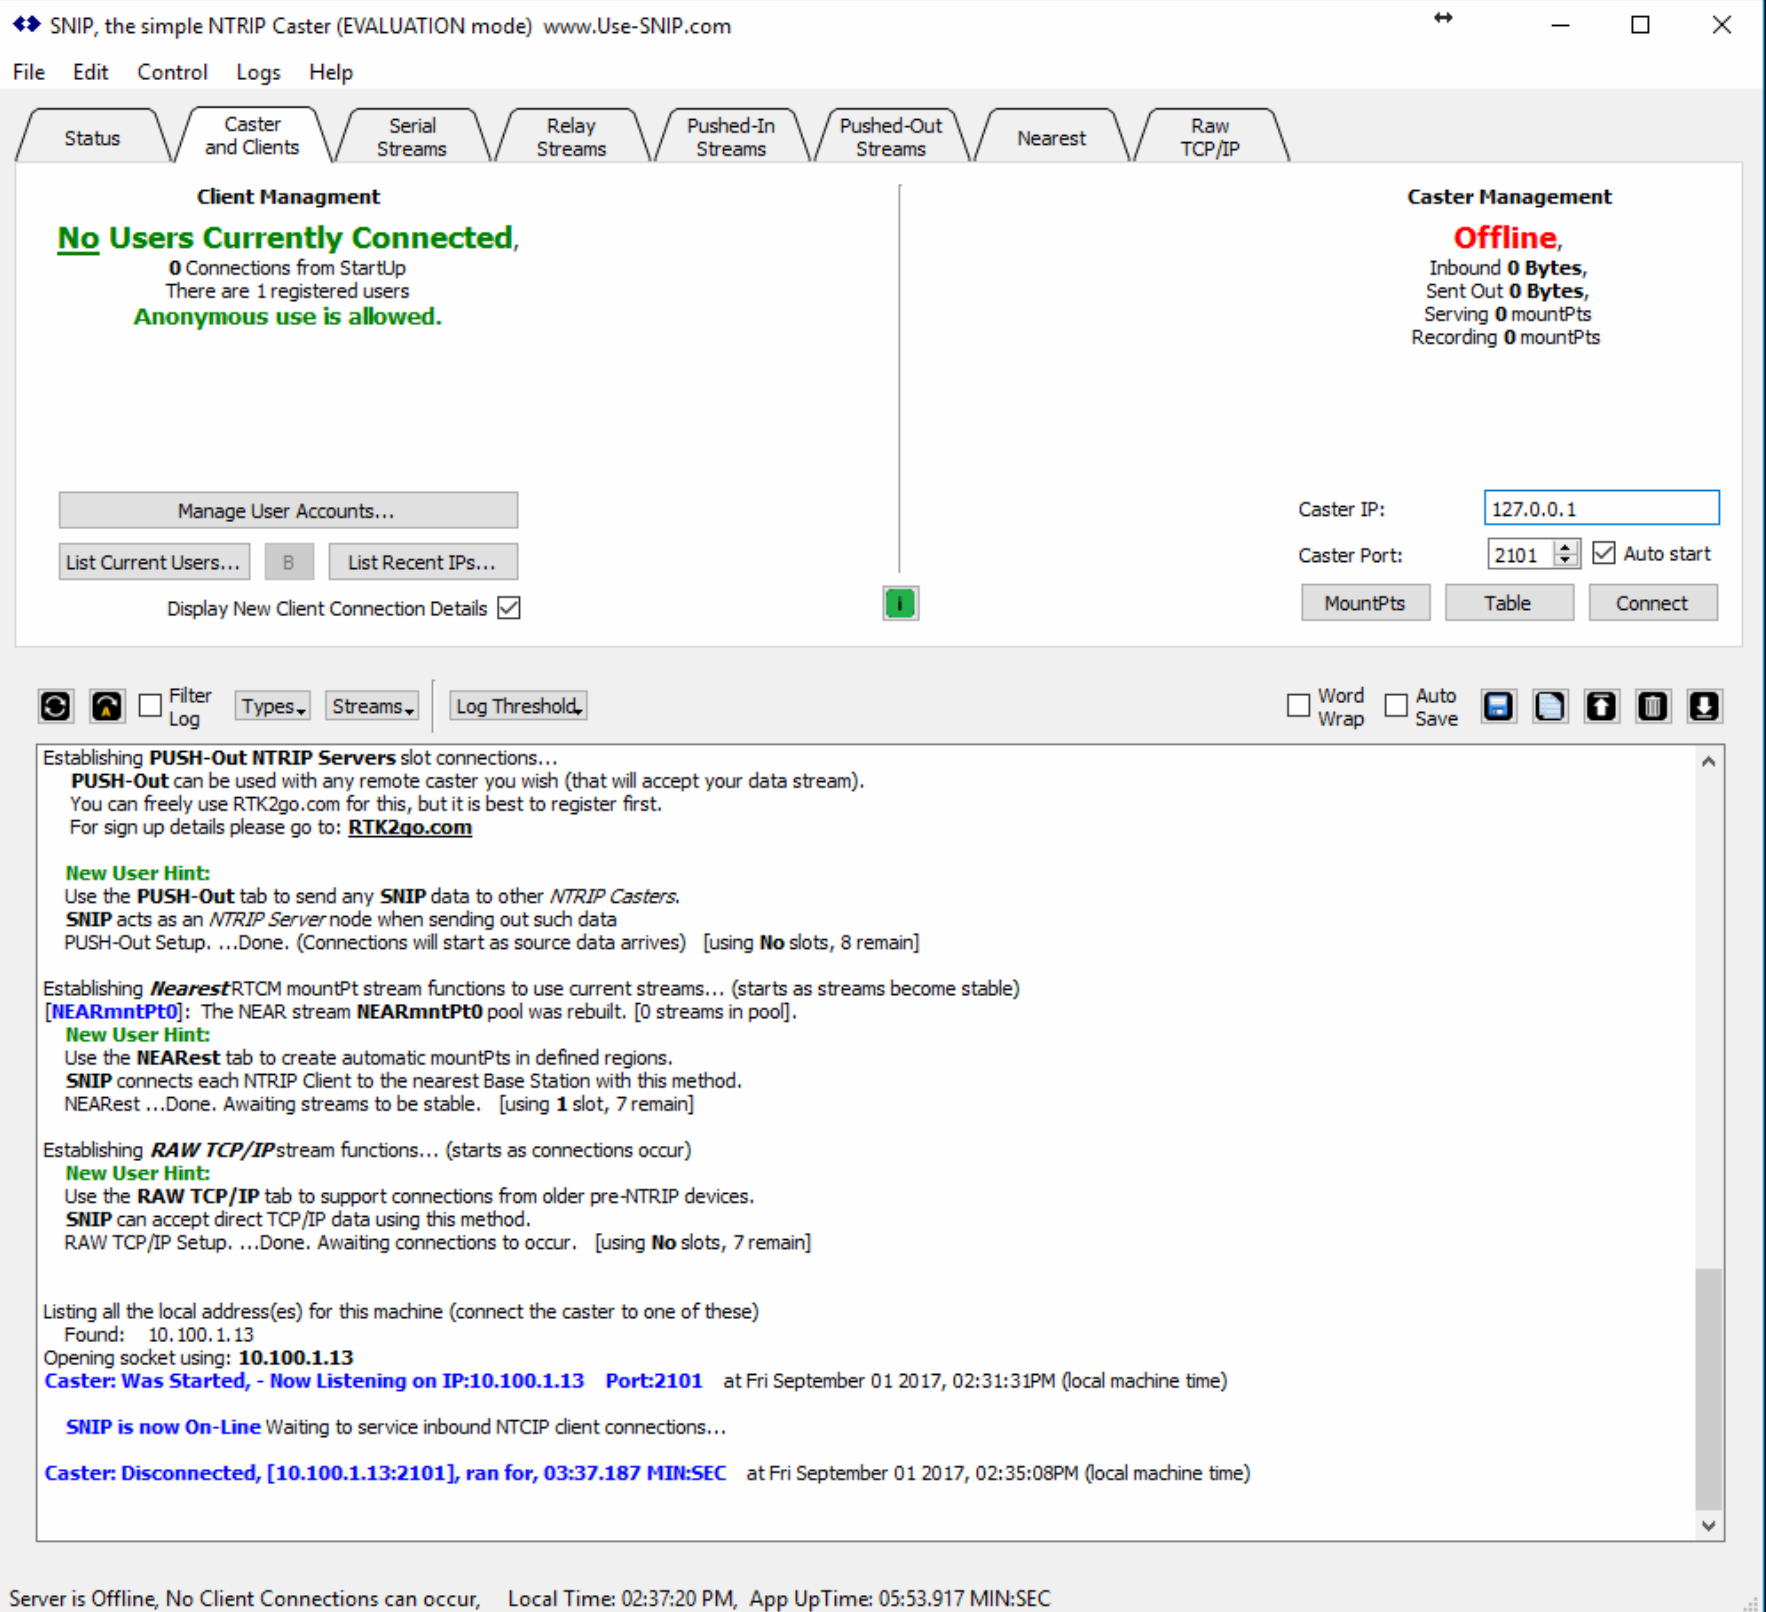
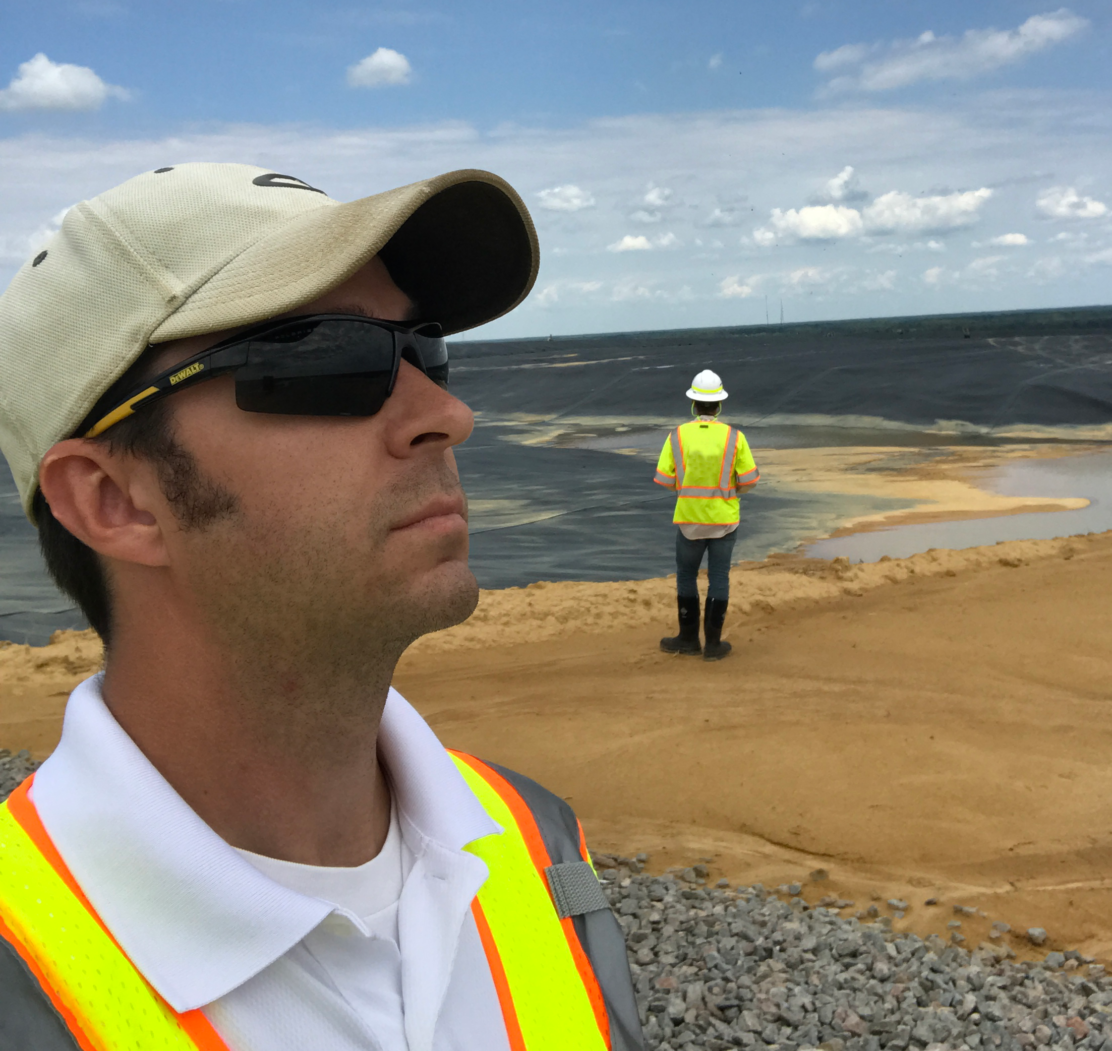
The default install will set your caster to listen on localhost / 127.0.0.1. We want to change that to the publically available IP. For this example I am using an IP that is not public and all of my equipment is on my local network.
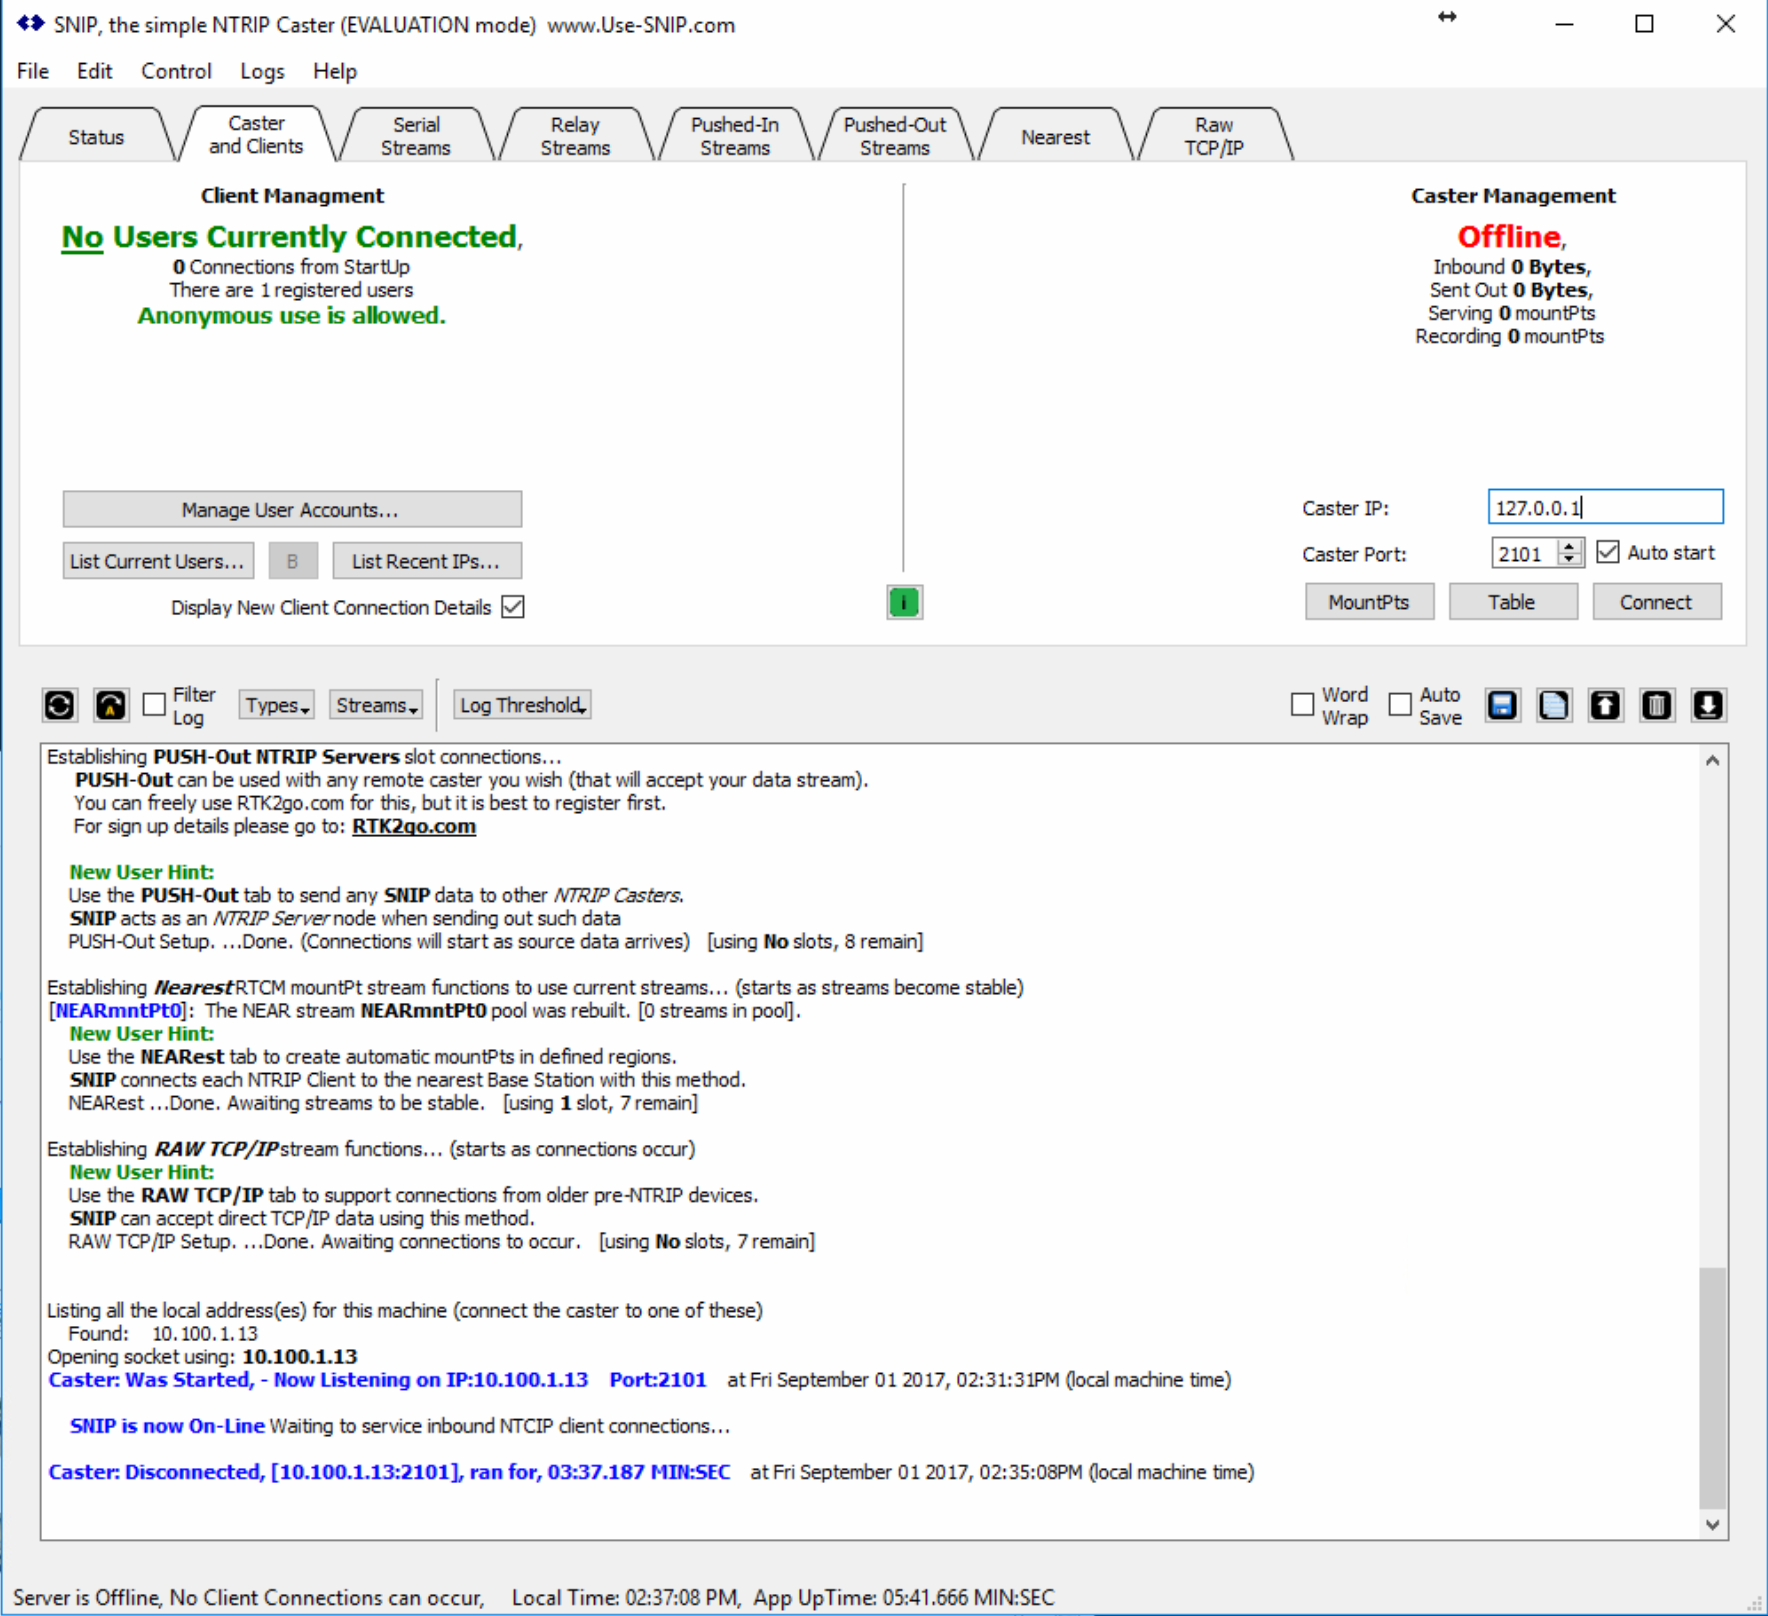
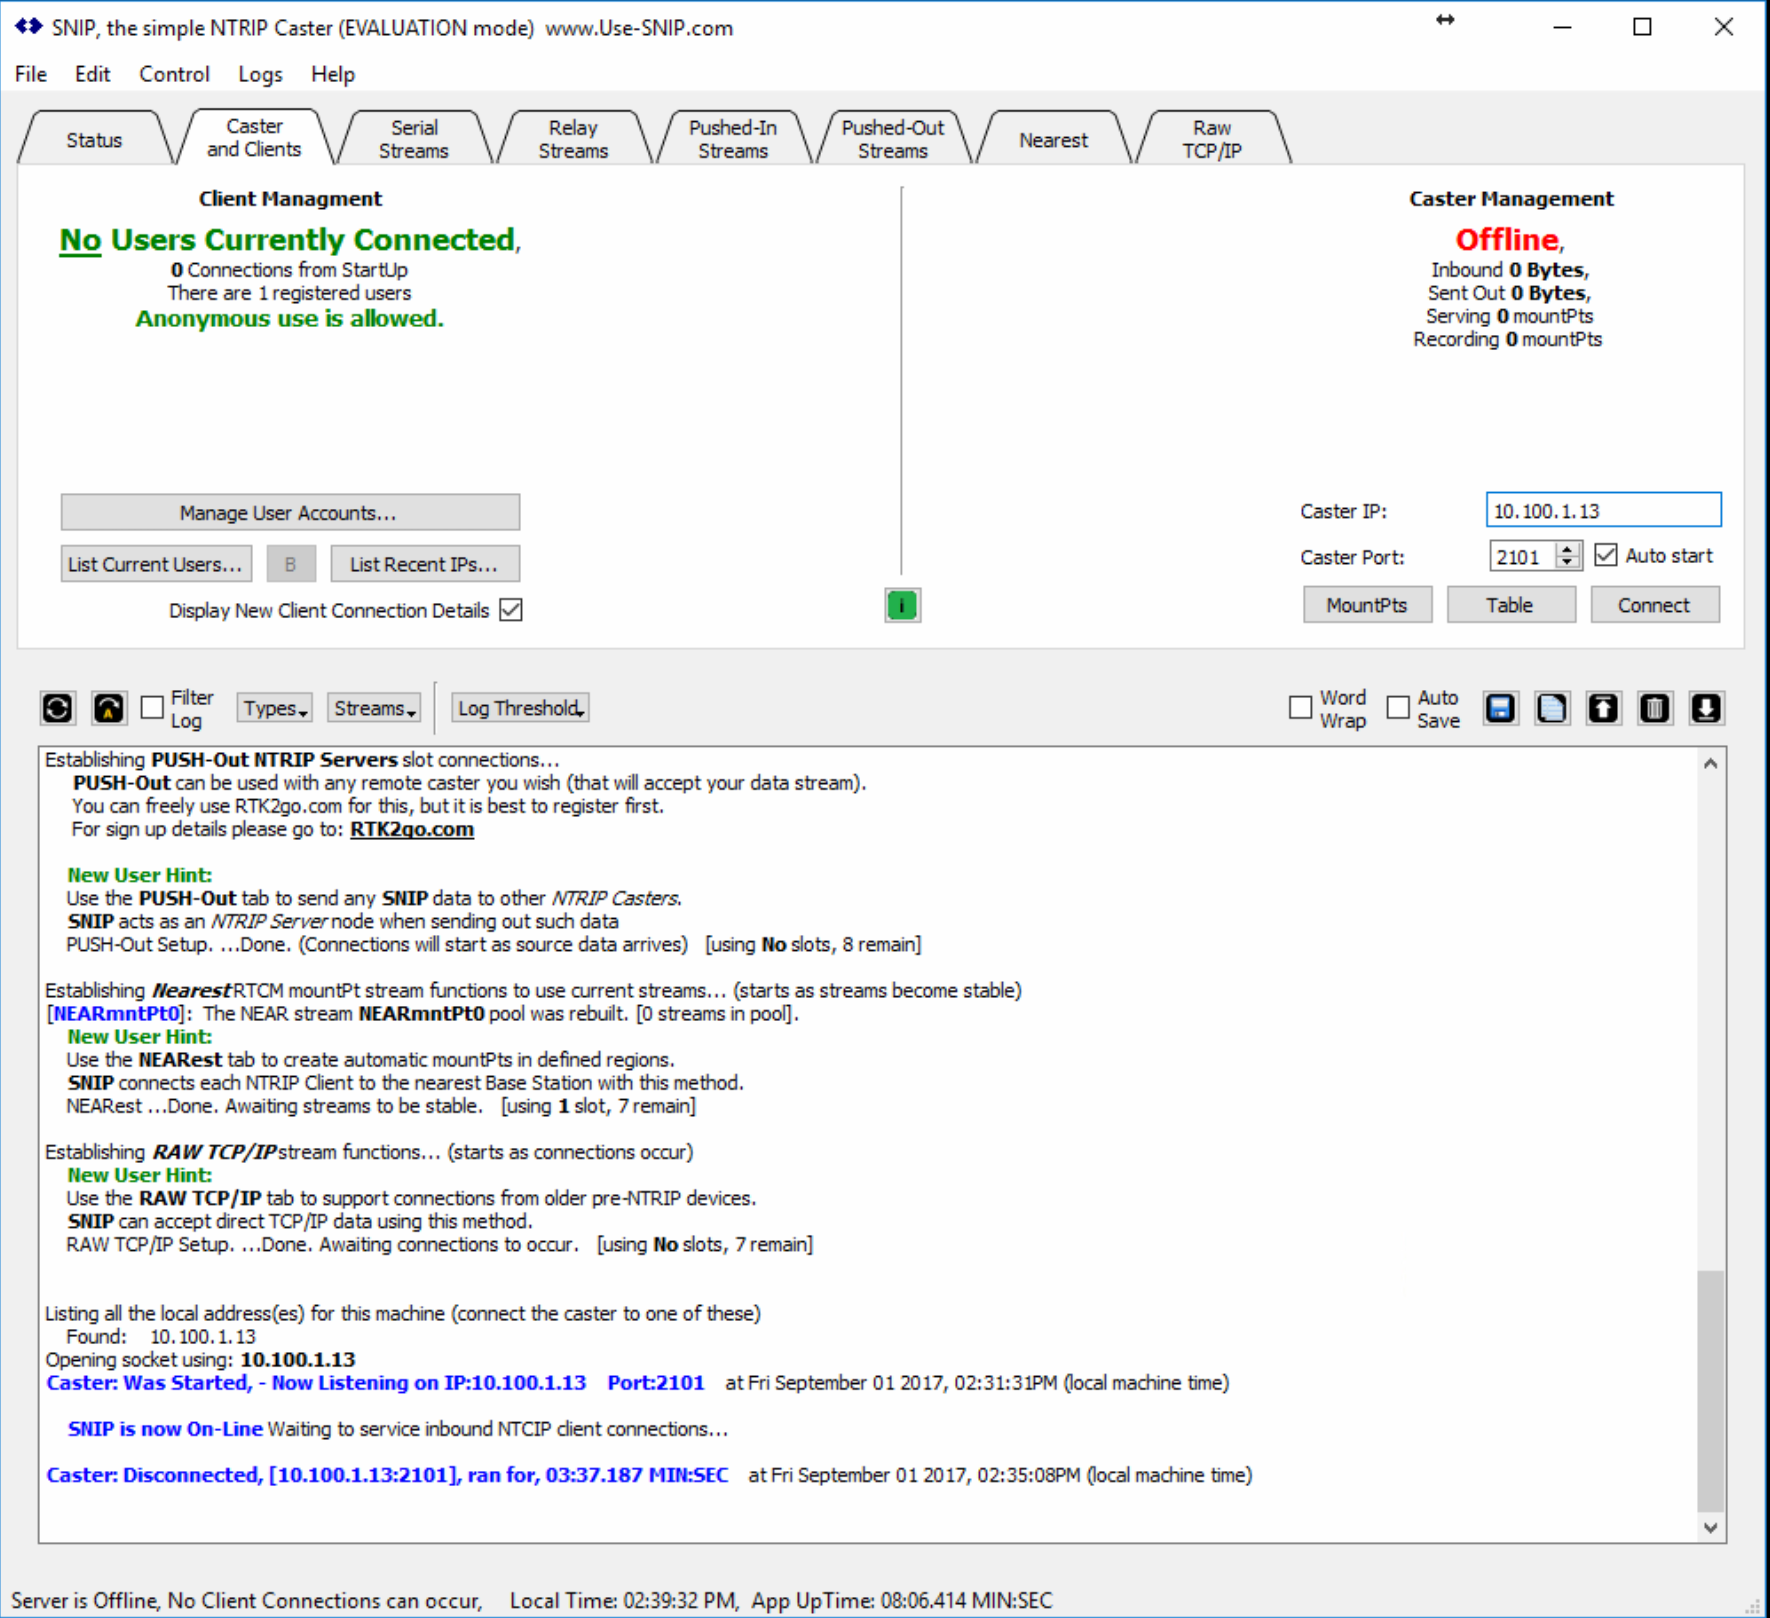
My Caster is going to run on IP 10.100.1.13 using port 2101 so let’s change the IP. Click on the Caster and Clients tab then make sure the Caster is stopped. If it is running, click Disconnect button so you can change the IP then enter the IP address.
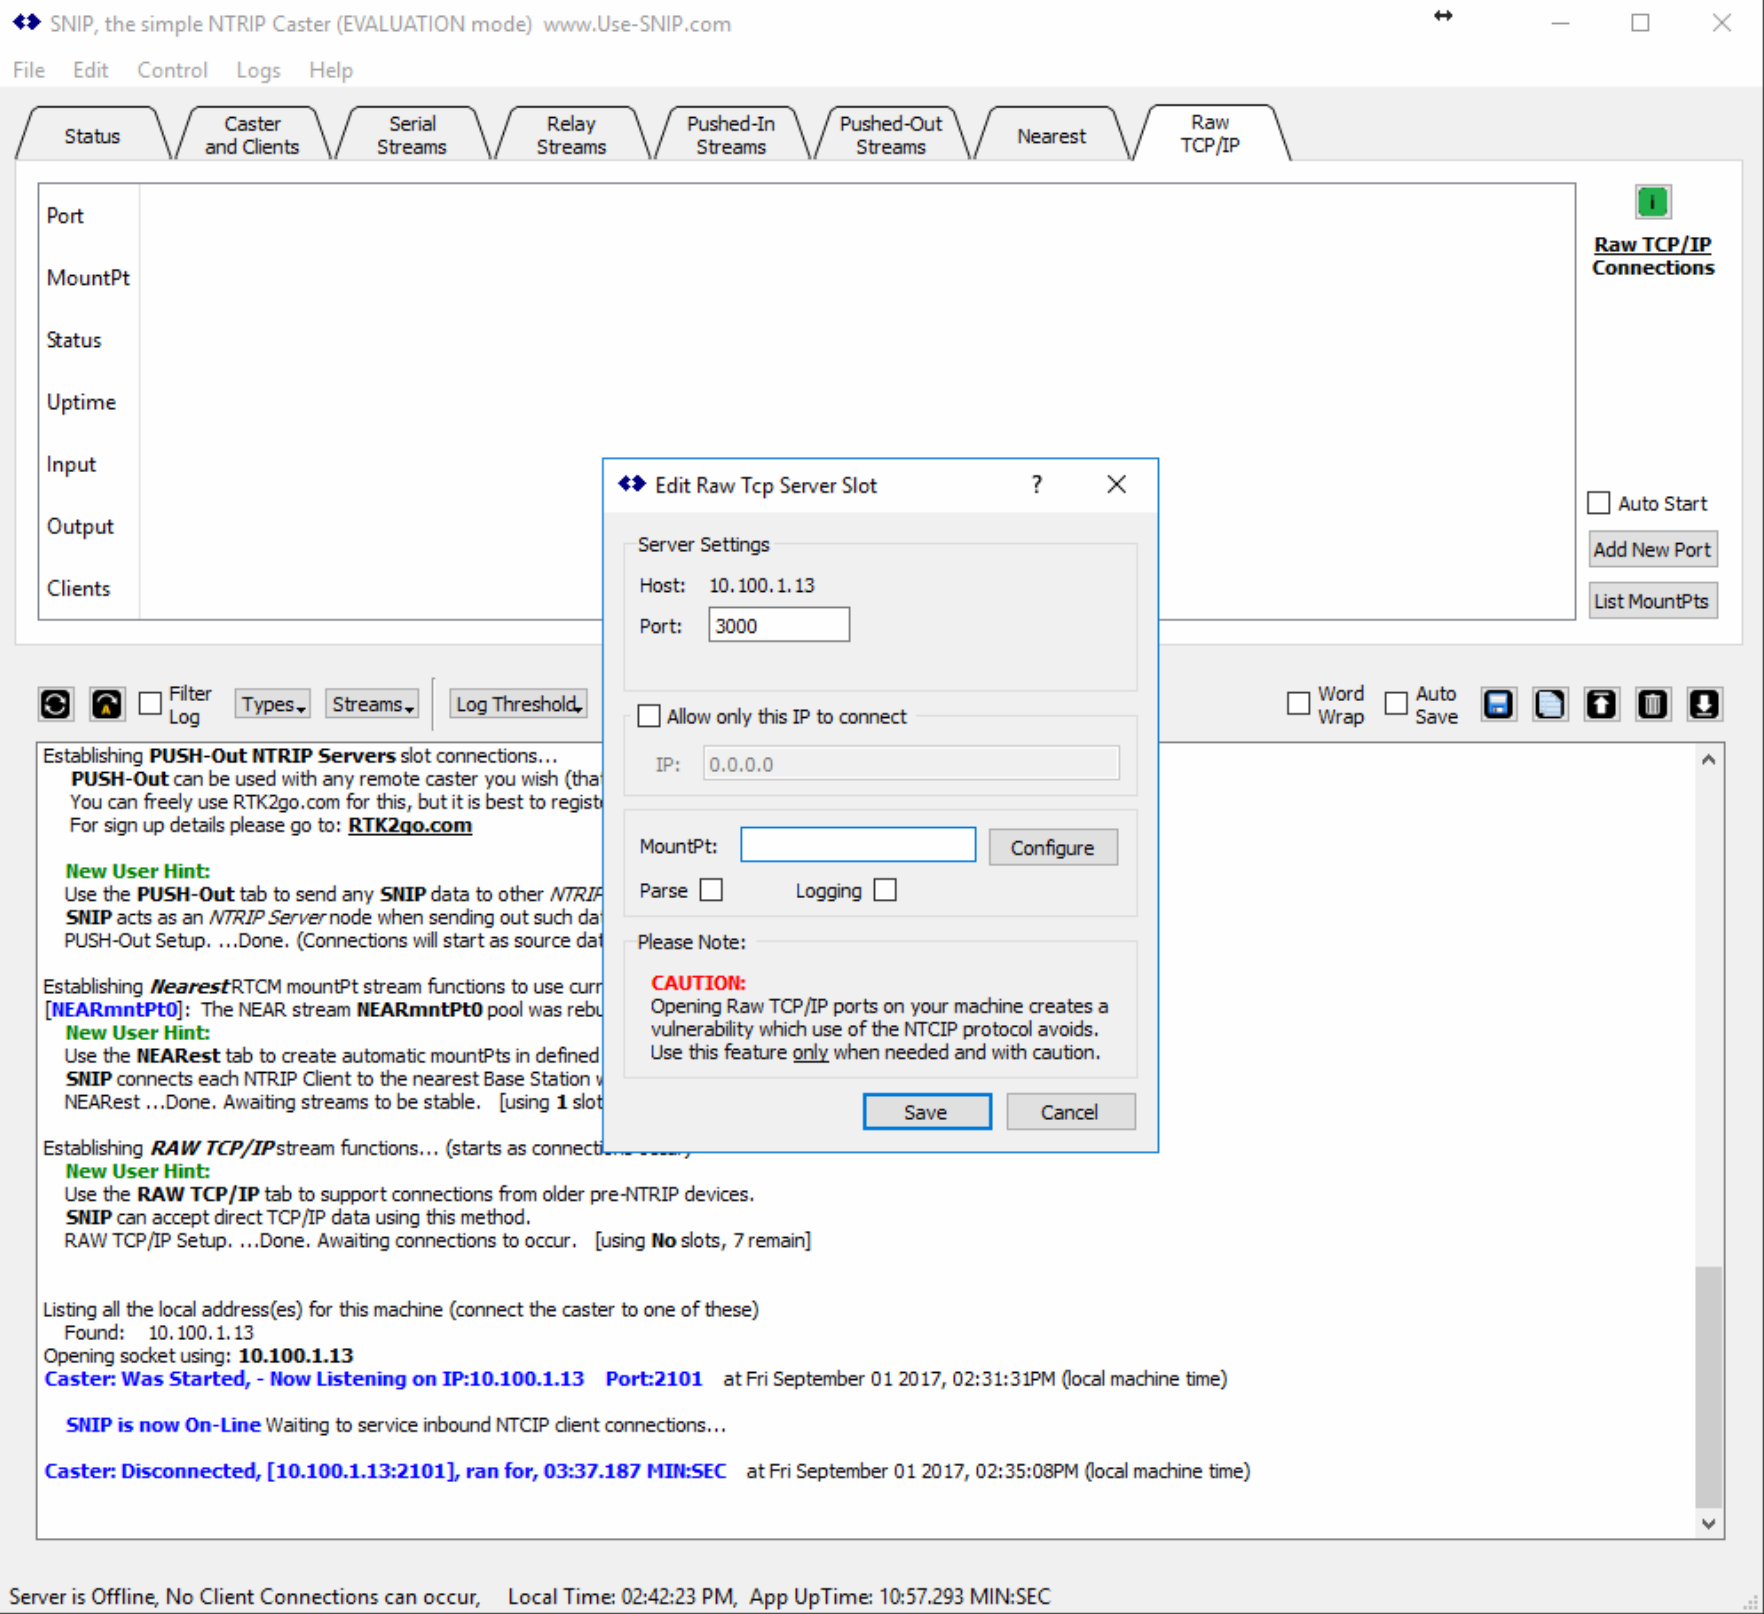
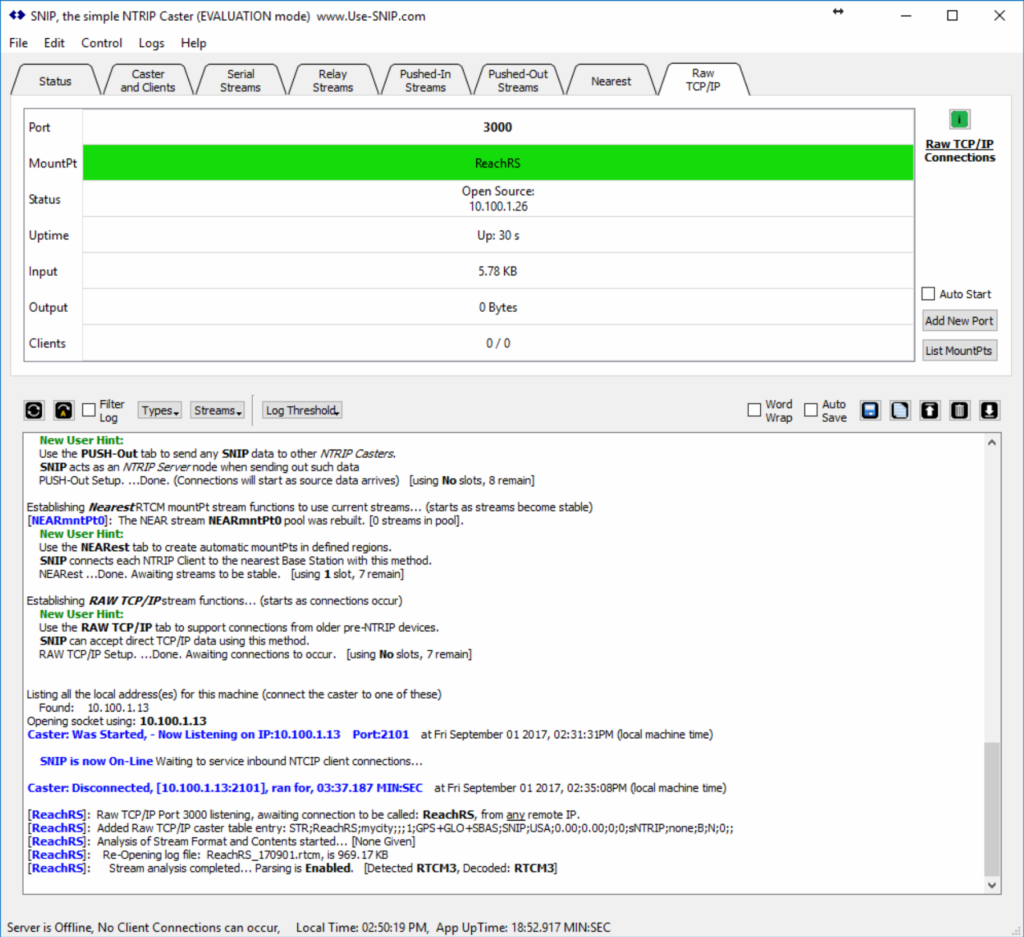
Now that we have our Caster set up to run on the correct IP. Lets move on to setting up the a RAW TCP/IP port for input from the Base. Click on the Raw TCP/IP tab then click on Add New Port.

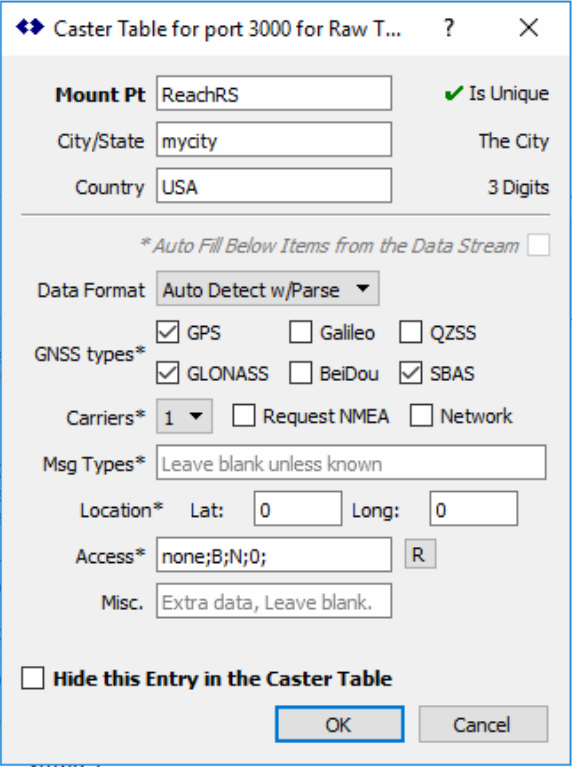
Enter a MountPt then click configure.
Enter your city/state, country and select the appropriate GNSS types, Carriers and set your Base lat and lon.
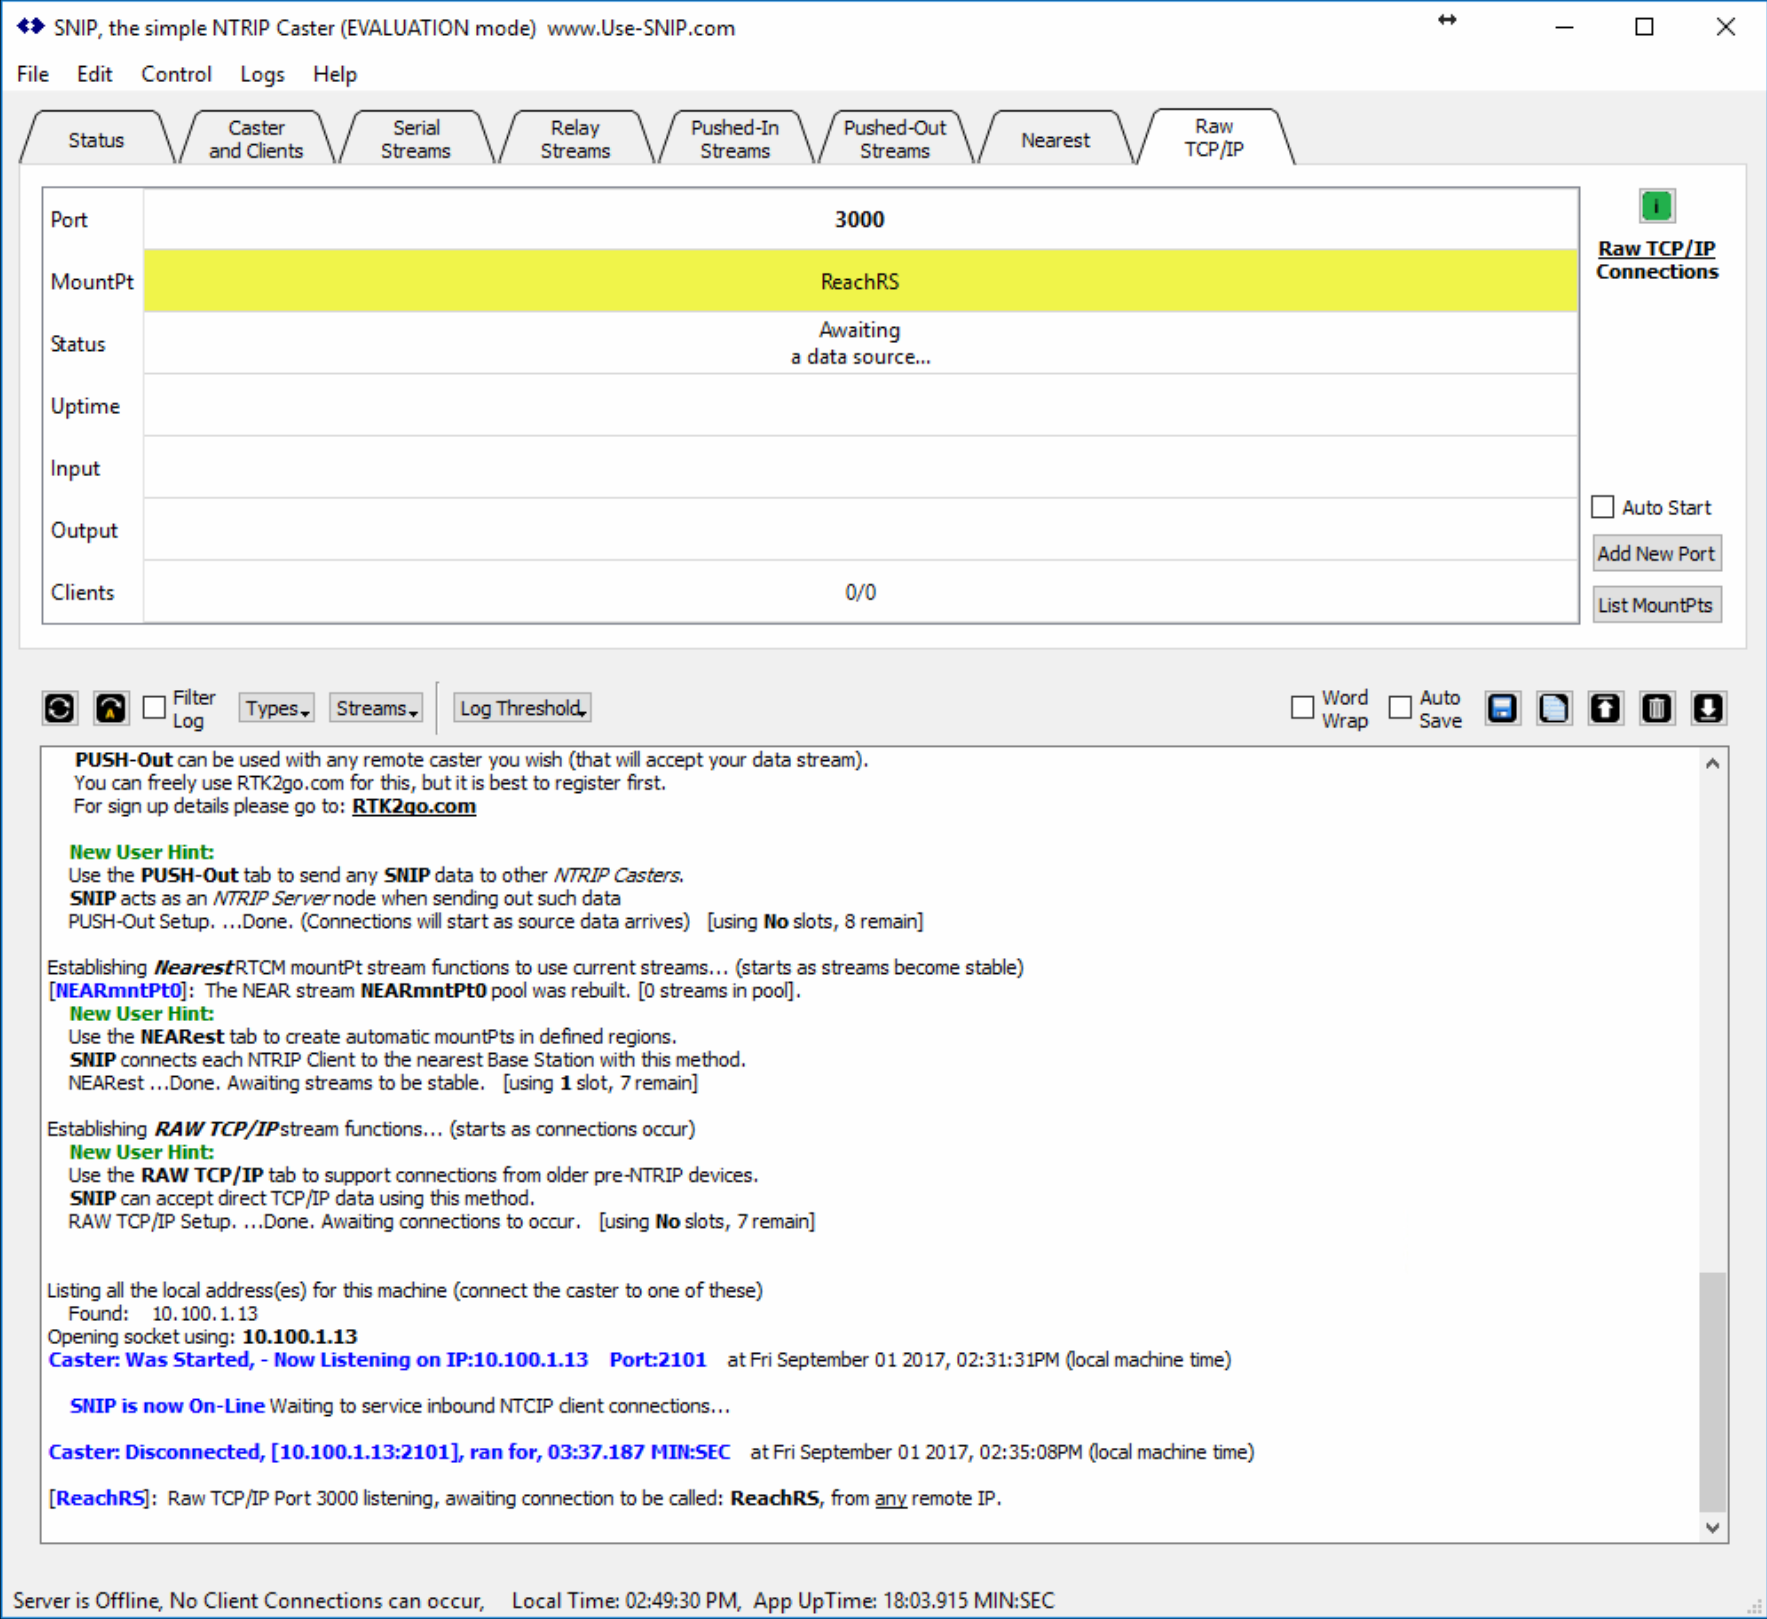
Our Raw TCP/IP port is now waiting for a connection from our Reach RS Base.
Next we need to configure our Reach RS Base to send its corrections output to the SNIP NTRIP Caster on the Raw TCP/IP port we configured using RTCM3. Your Base needs to have a network connection to your NTRIP Caster. If your NTRIP Caster has a public IP you do not have to have your Base on the same physical network if your Base is on a network with an internet connection. Mine are on a local network in this example.
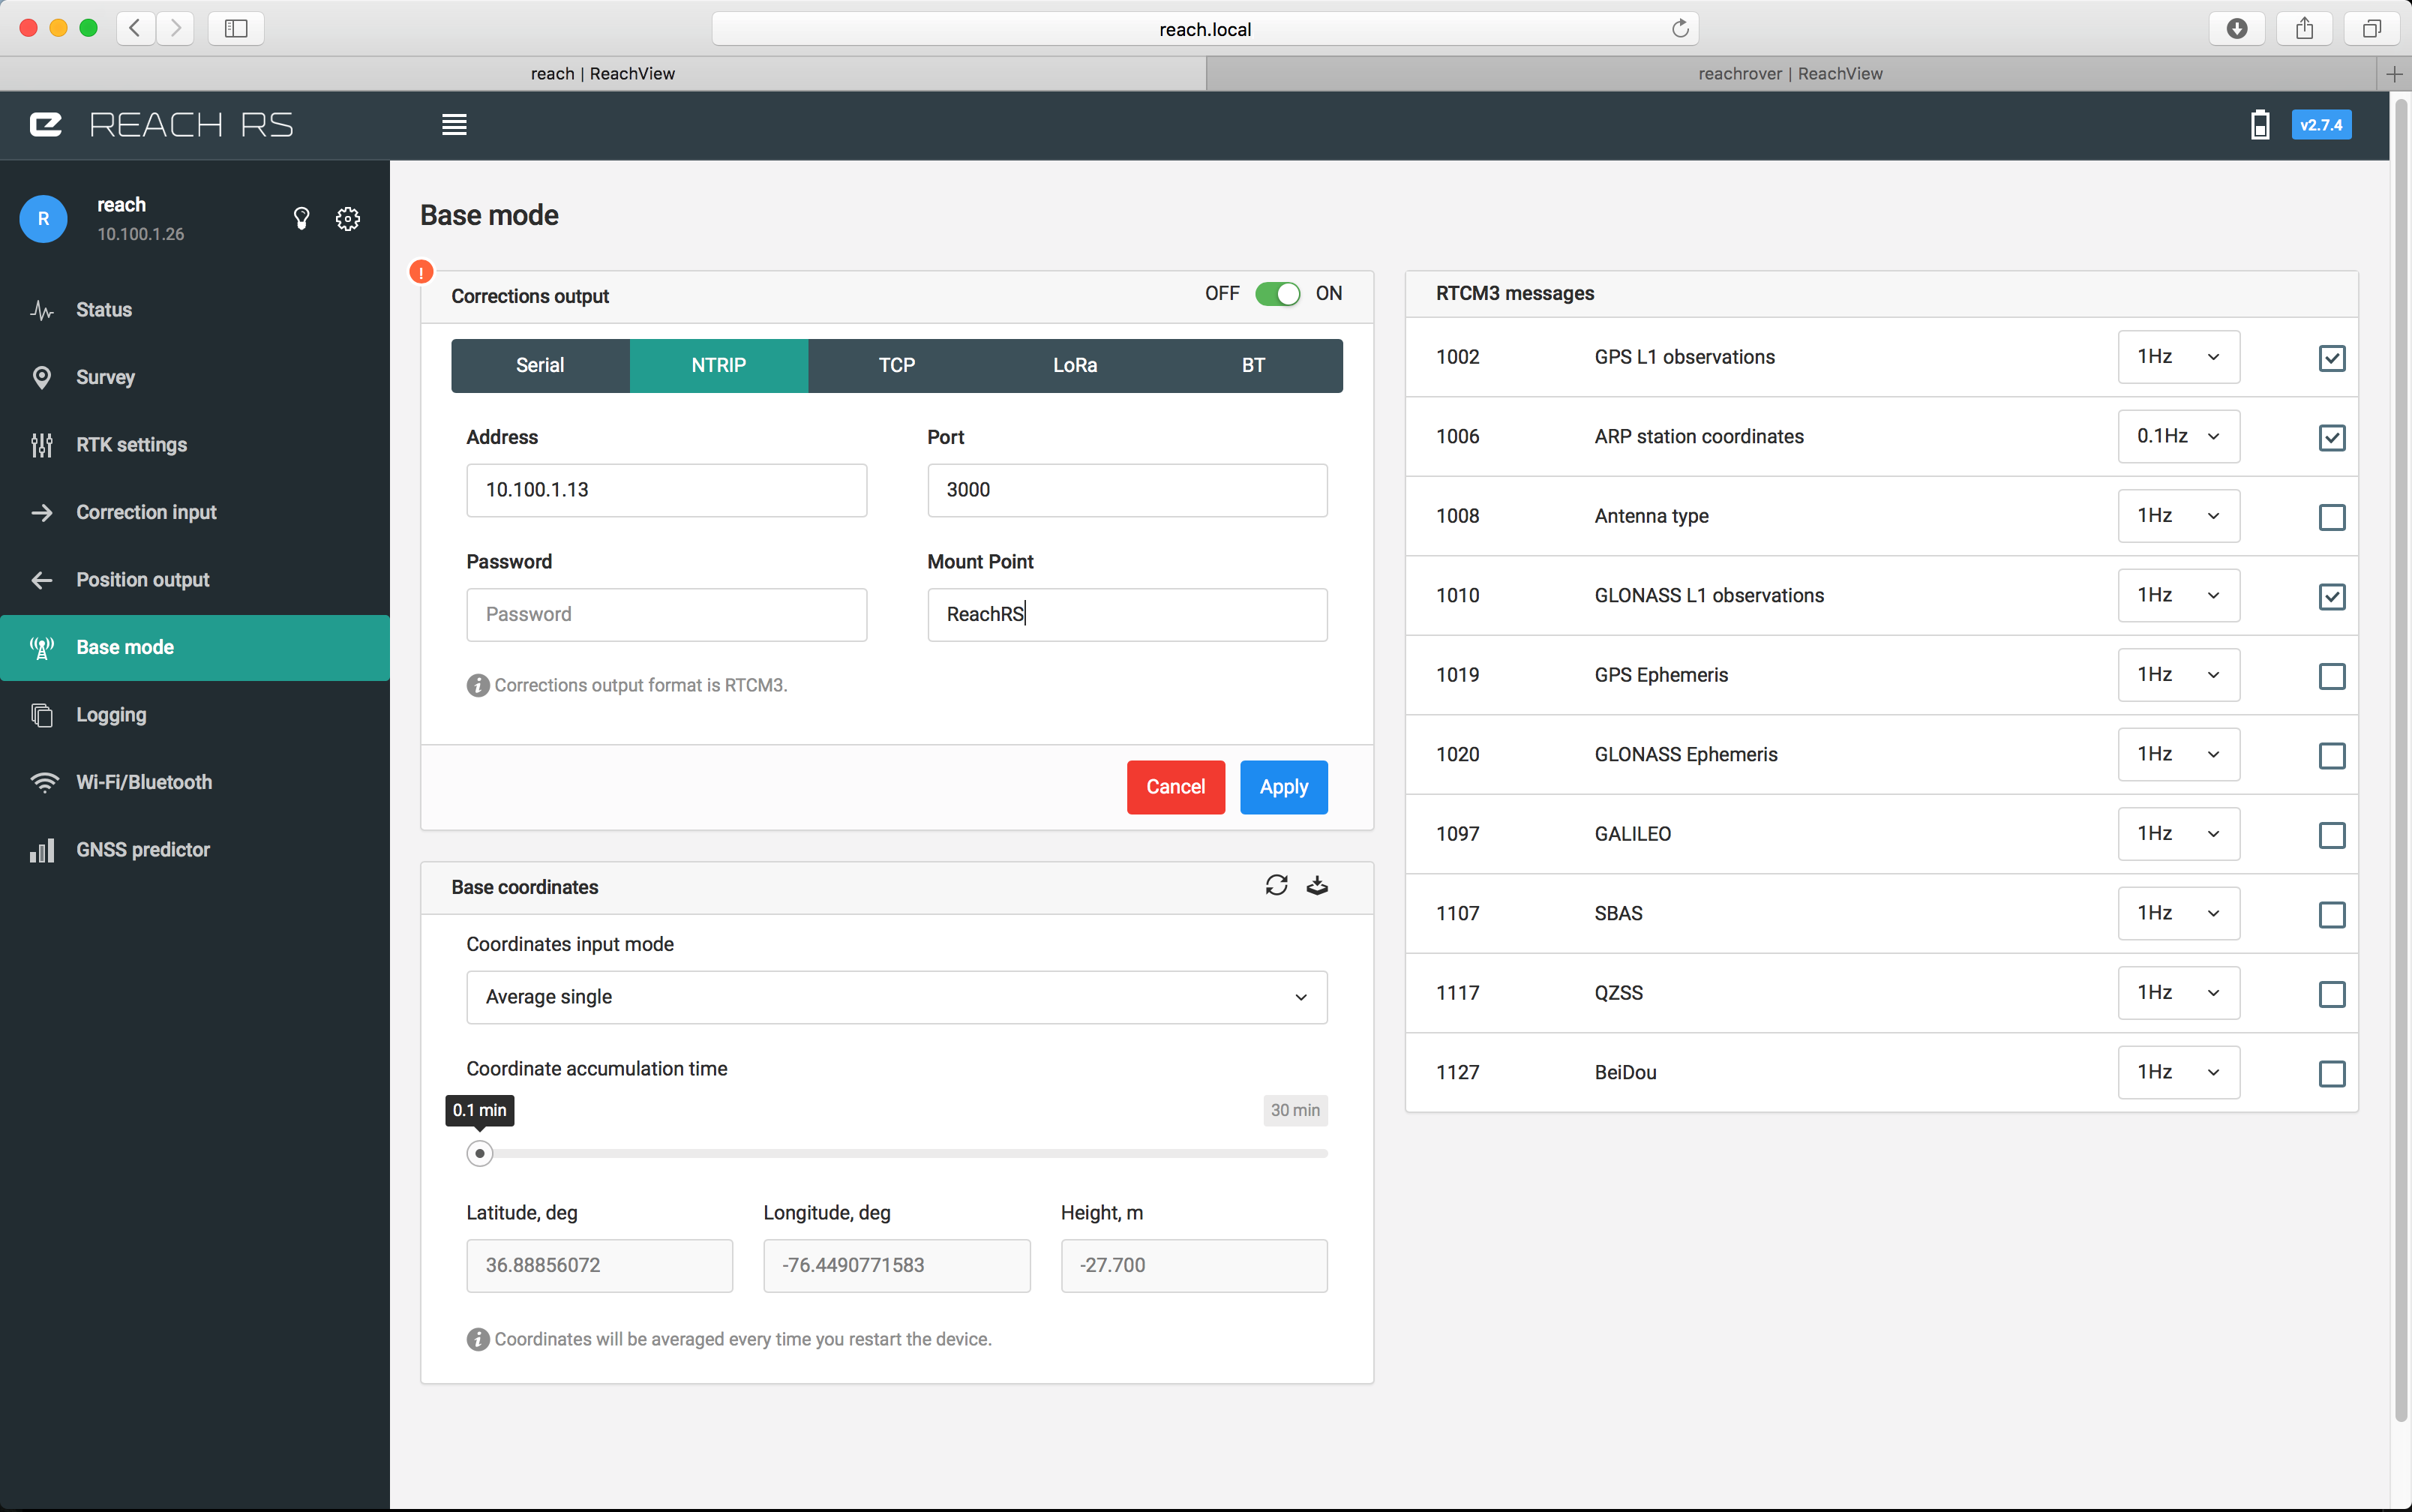
Enter the IP you gave your SNIP Caster, the port you set up for the Raw TCP/IP connection and the Mount Point. In this case its 10.100.1.13, 3000 and ReachRS then apply.
Once you hit apply you can go back to the SNIP application on the Raw TCP/IP tab and you should see it is now green indicating there is a connection and correction data from the base hitting the caster.
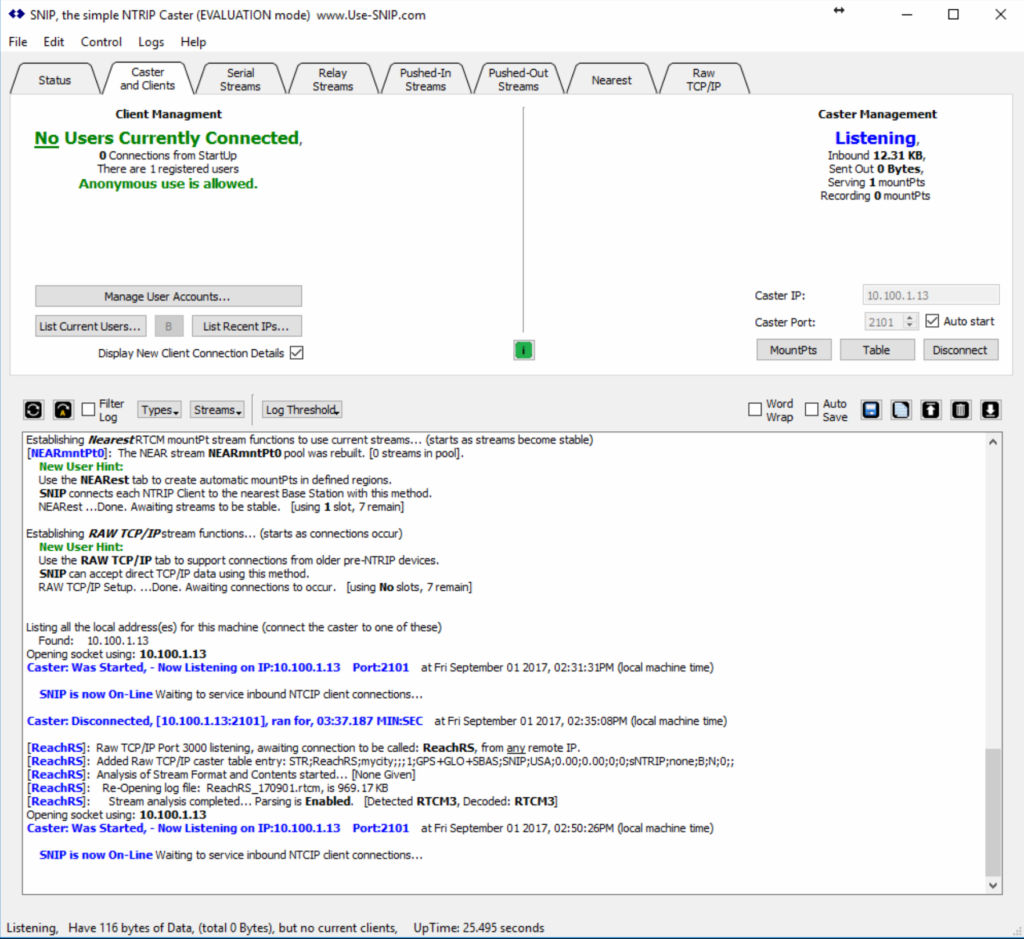
Go back over to the Caster and Clients tab and start up your NTRIP Caster by clicking the connect button.
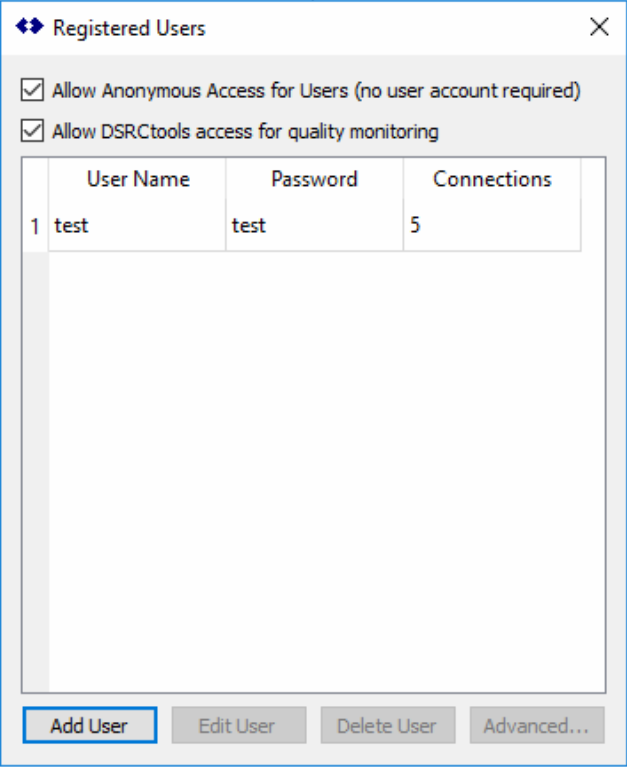
We need to create a user on the Caster for our Reach RS Rover to subscribe to the corrections. On the Caster and Clients tab click the Manage User Accounts button then add a user.
Now that we have an NTRIP Caster running with corrections from our Reach RS Base it is time to point our Reach RS Rover to get correction data from the SNIP NTRIP Caster.
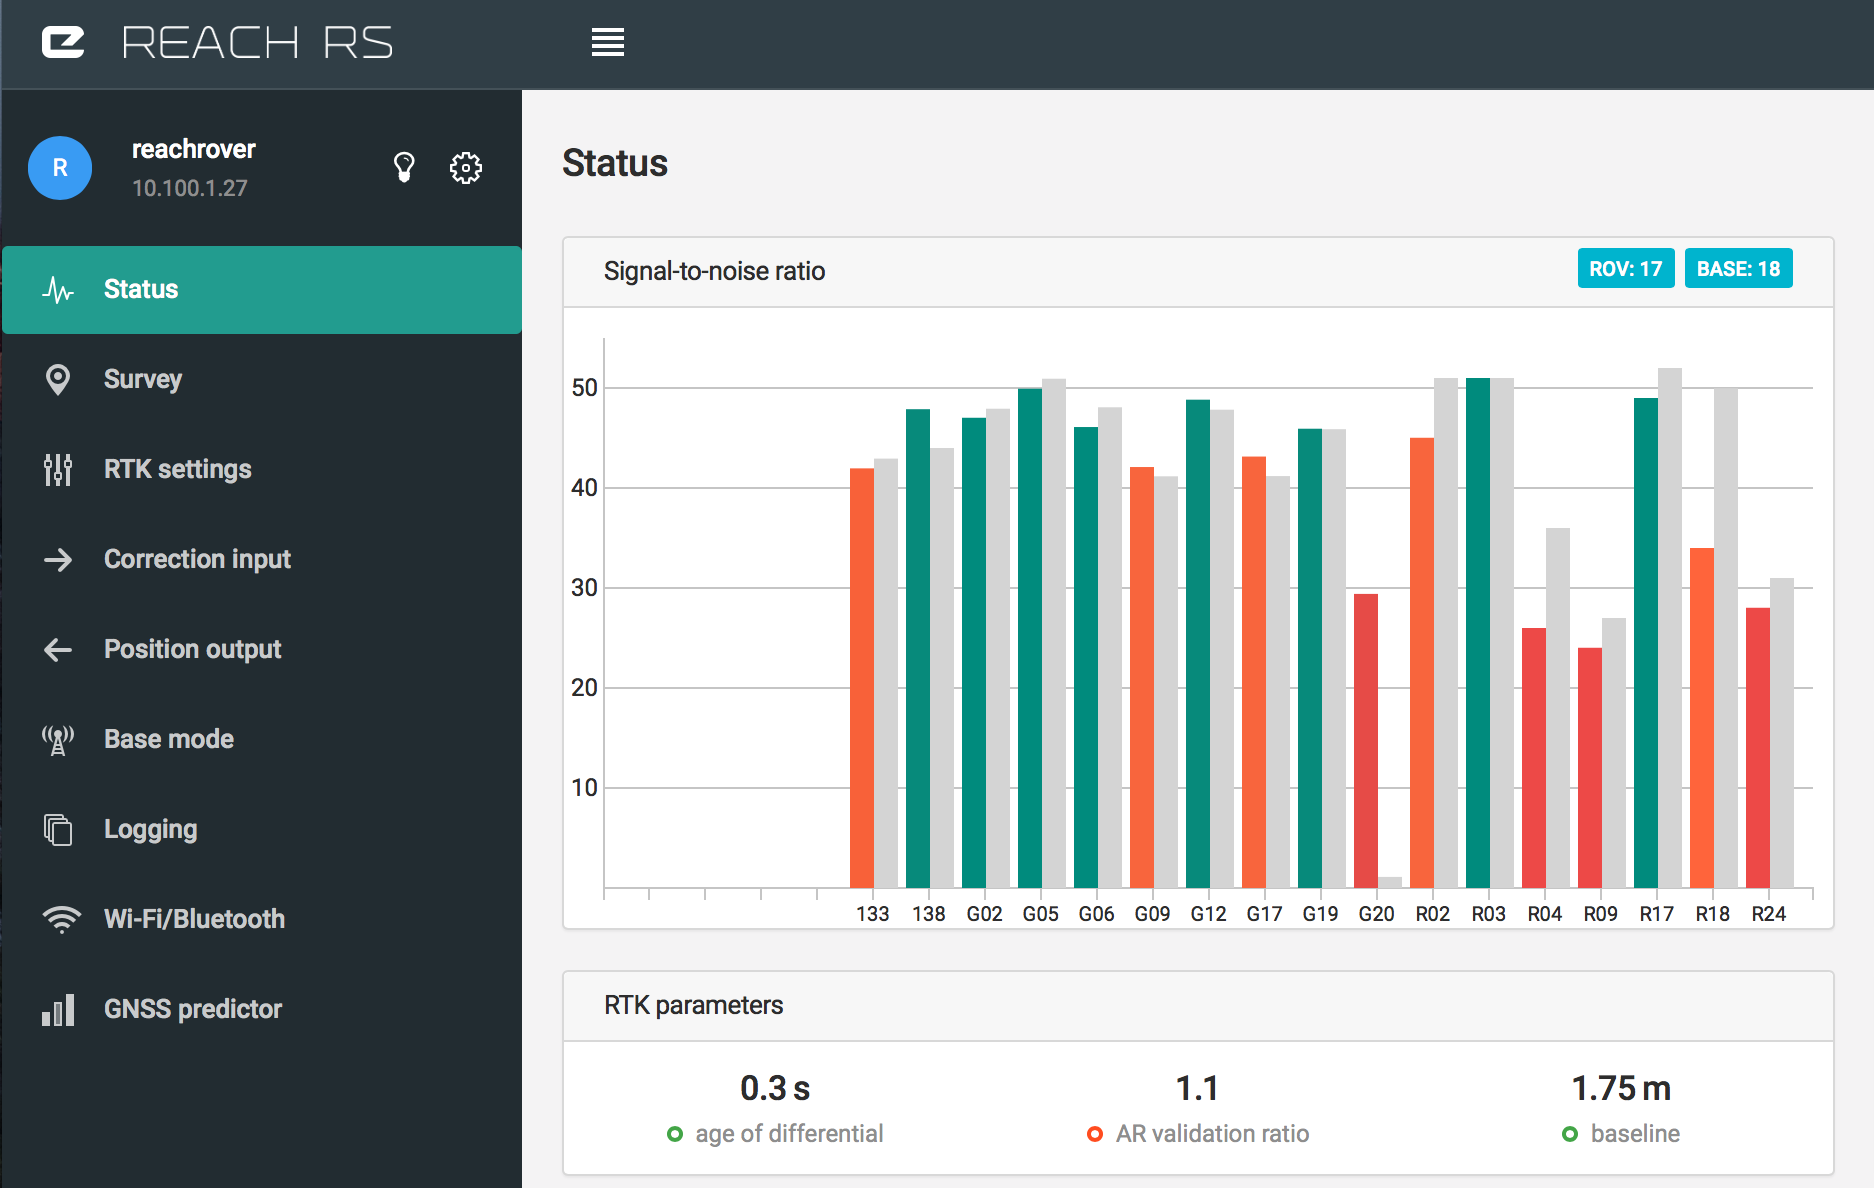
You will need an internet connection for your Rover when you are in the field. Mine is on a local network with my NTRIP Caster for this example. Click on the Correction Input on your Reach RS Rover then turn on Base correction and select NTRIP. We are going to enter the address, port, username, password and the mount port for our SNIP NTRIP Caster. In my example that is 10.100.1.13, 2101, test, test and ReachRS. Hit Apply and you should now be getting correction data from your Reach RS Base using the SNIP NTRIP Caster.
Note: I was not able to get the Rover using my SNIP NTRIP Caster without supplying a username and password in the Reach RS Rover. I had anonymous enabled on the SNIP NTRIP Caster, but it would not work. I could have missed something, but its a much better practice to limit your access than rather leaving it open.

Look at the Status of the Reach RS Rover and you should see it getting a differential now.
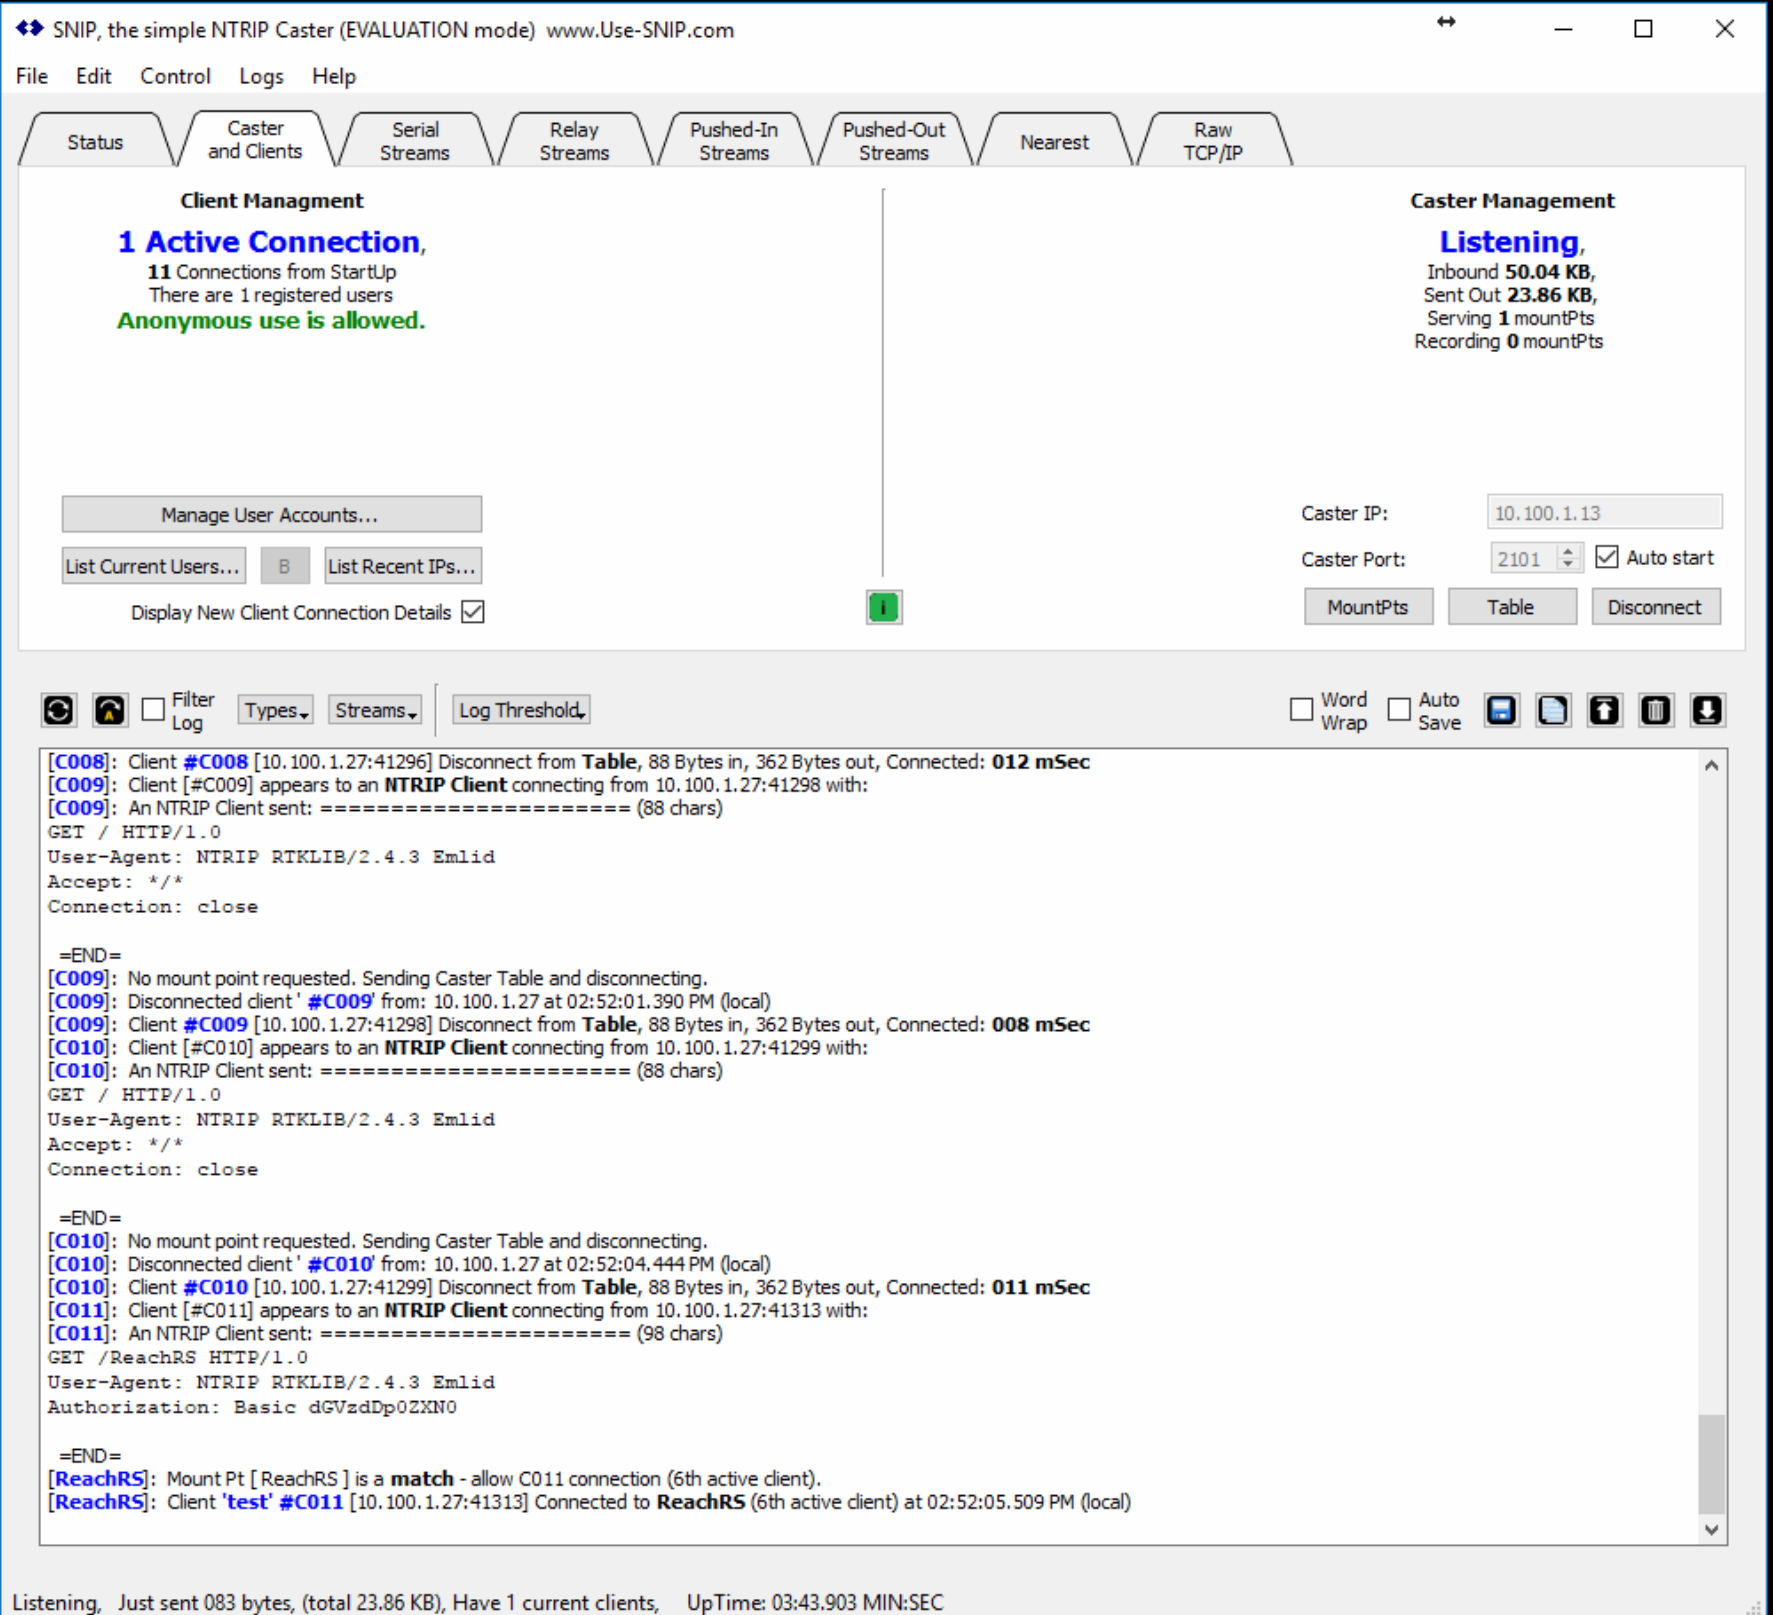
You should also see the an active connection on the Casters and Clients tab on SNIP.
If you do not have a publically exposed computer to run an NTRIP Caster then consider using the freely available community NTRIP Caster at http://RTK2go.com. RTK2go runs SNIP as a free online caster with a few terms and conditions:
By sending your data stream to this Caster you affirm that:
a) You have the right to do so, and
b) You consent to allow others to freely use your data, and
c) The caster owner / operator shall be held harmless for any faults or loss – real or perceived.
The caster owner / operator (SCSC) reserves the right to remove or block any party for abuse.
If you do not have the infrastructure to host your own caster it can be a great solution for you.

